Installing a Hot Water Heat Pump? Avoid These 8 Common Mistakes
Last Updated: 15th Apr 2025 By Finn Peacock, Chartered Electrical Engineer
Hot water heat pumps are the most efficient way to heat your water anywhere in Australia, south of Brisbane. However — as with any technology — the system is only as good as its installation. A poorly installed heat pump is less efficient, has higher running costs, and may be unsafe.
In this article, I’ll explain eight common mistakes heat pump installers make and how to spot them.
Table of Contents
- Lack of Insulation
- Draining to the Floor
- No Clearance for Sacrificial Anode
- No Dedicated Electrical Connection
- Untidy Cabling
- No Proper Base
- No Clearance for Airflow and Maintenance
- Not Having the Timer Set
- What a Good Installation Requires
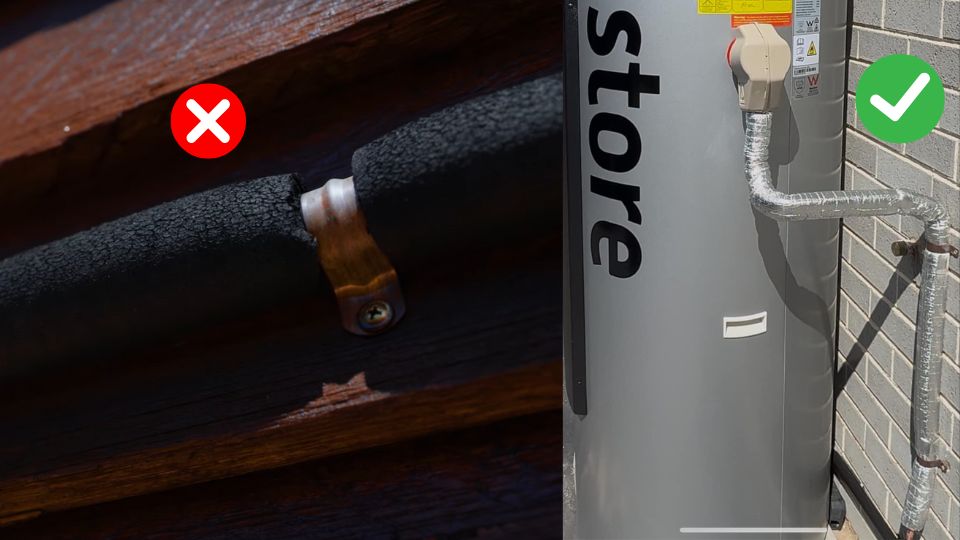
Mistake #1: Lack of Insulation
Mandatory: Proper insulation on hot water pipes, valves and fittings.
Best Practice: Insulating the hot water drain line too.
Lack of insulation on hot water pipes, valves, and fittings will cause heat loss making your heat pump less efficient. Badly insulated pipework can double the heat loss from a heat pump.
Australian Standard (AS/NZS 3500.4) requires insulation on all hot water pipework, valves and fittings.
The thickness of the insulation you need for your external pipes depends on where you live:
| NCC Climate Zones | Zone 1, 2, 3, 5 (e.g. NT, QLD, Sydney, Adelaide, Perth) | Zones 4, 6, 7 (e.g. inland NSW, VIC, TAS) | Zone 8 (alpine) (e.g. Thredbo) |
|---|---|---|---|
| Thickness foam | 13 mm | 25 mm | 38 mm |
Rule of thumb: if it’s hot to touch, it should be insulated.

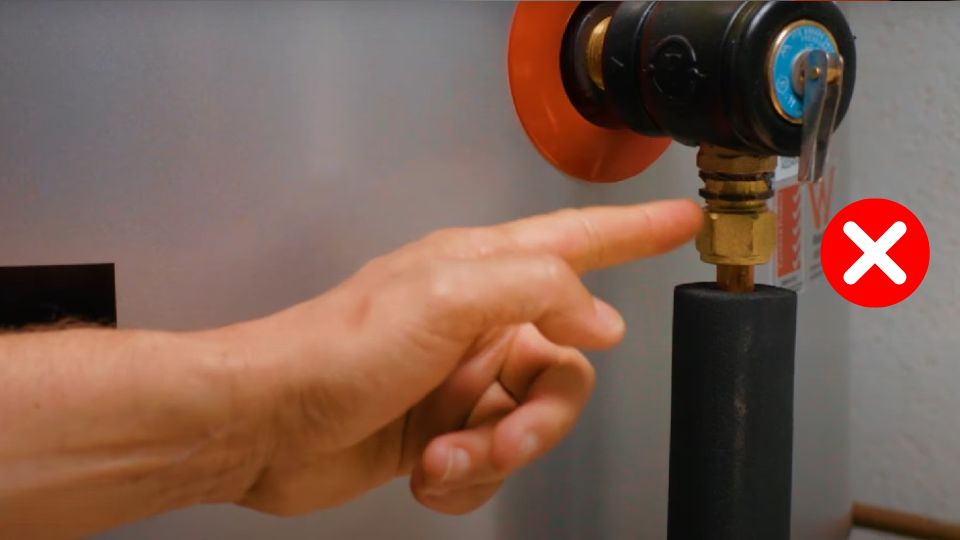
Best practice: Foil-covered insulation.
Specify foil-covered insulation when getting quotes if your heat pump’s pipes will be in the sun. It will last longer and look better.
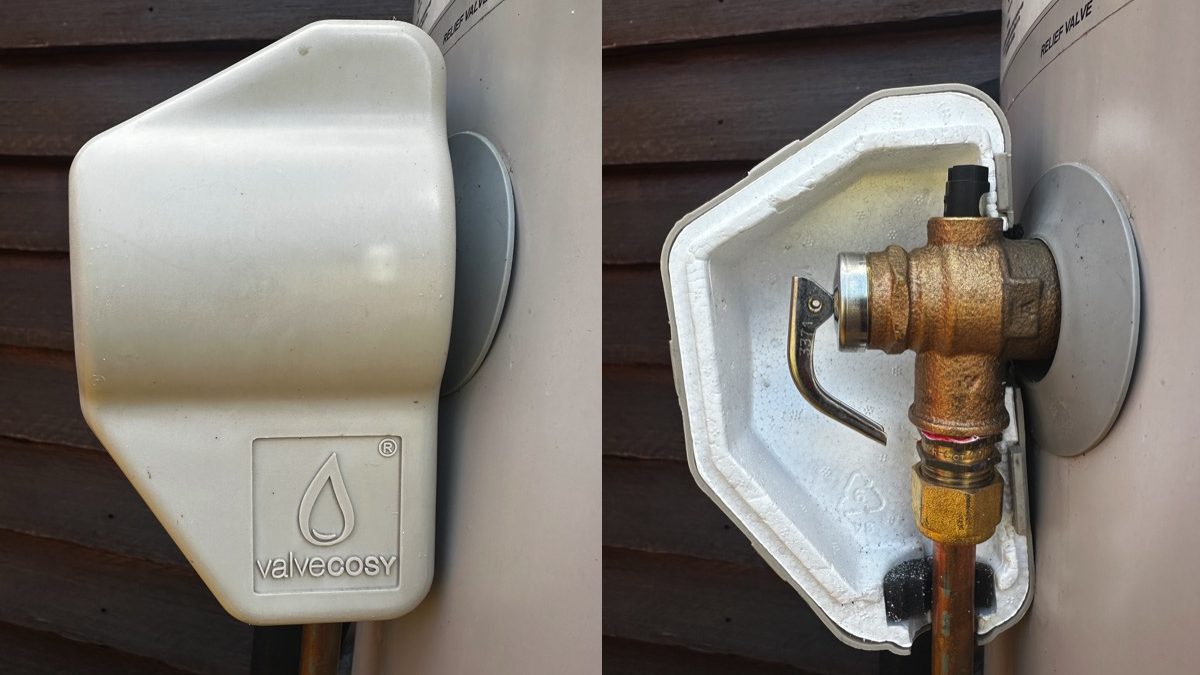
Best Practice: Valvecosy.
In my opinion, the best way to insulate the pressure relief valve is the $30 Valvecosy:
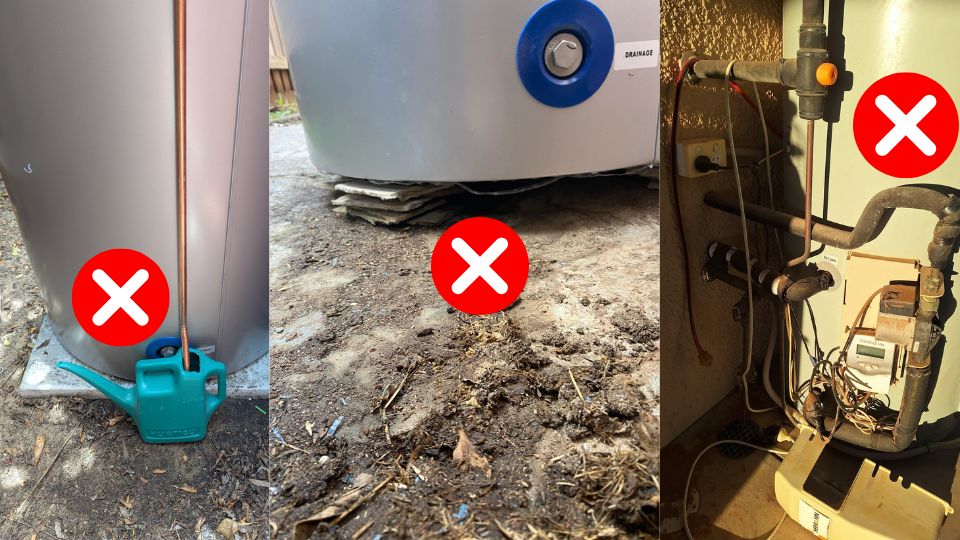
Mistake #2: Draining to the Floor
Hot water heat pumps need two drains. One for hot water to escape (it’s better than an exploding cylinder) and one for the small drip of condensate created by the heat pump’s operation.
The Australian plumbing standards require all heat pumps to have proper drainage for condensate and hot water overflow. A well-installed heat pump should never drain straight out onto the ground, but to a proper drain.
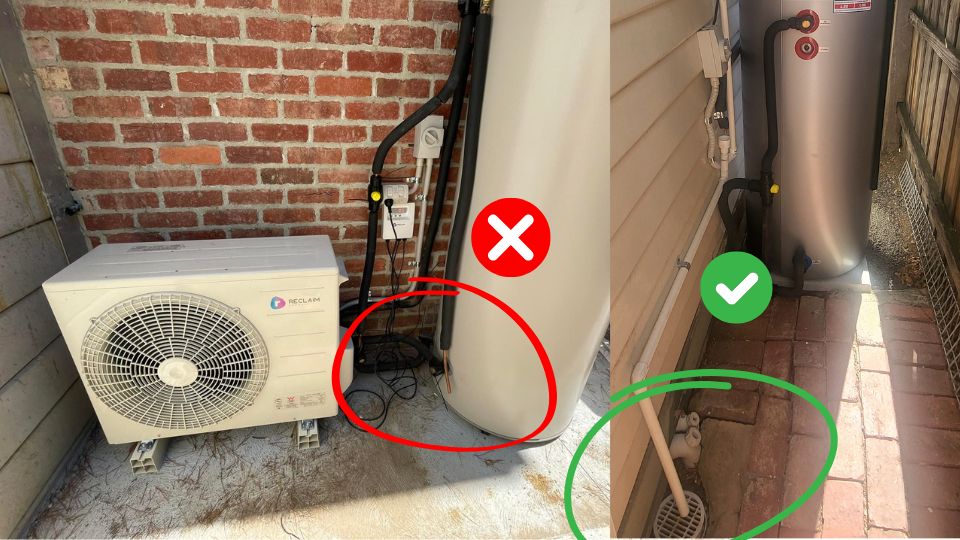
Mandatory: Run the piping from the pressure relief valve and condensation drain to a dedicated drain. Ensure the drain is not hidden, so it’s obvious to the homeowner when the drain is operating.
Tapping into a drain line requires an air gap.
Sometimes, there is no drain in the ground near the heat pump, but only a drain line that can be tapped into. In this case, the piping needs an air gap to be compliant.
Be careful where the air gap is.
Below is an example air gap. Unfortunately, this was right above an electrical outlet, and when the drain operated, the outlet got soaked!
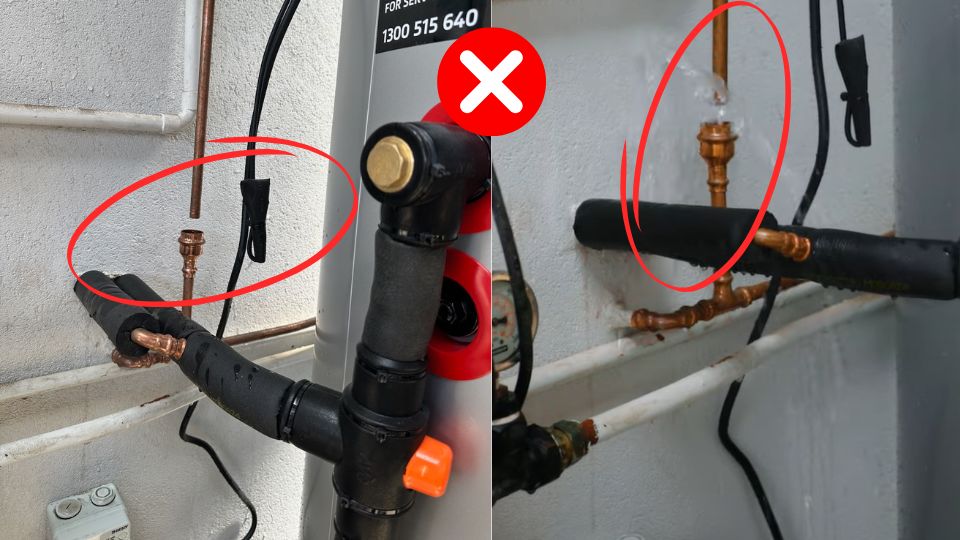
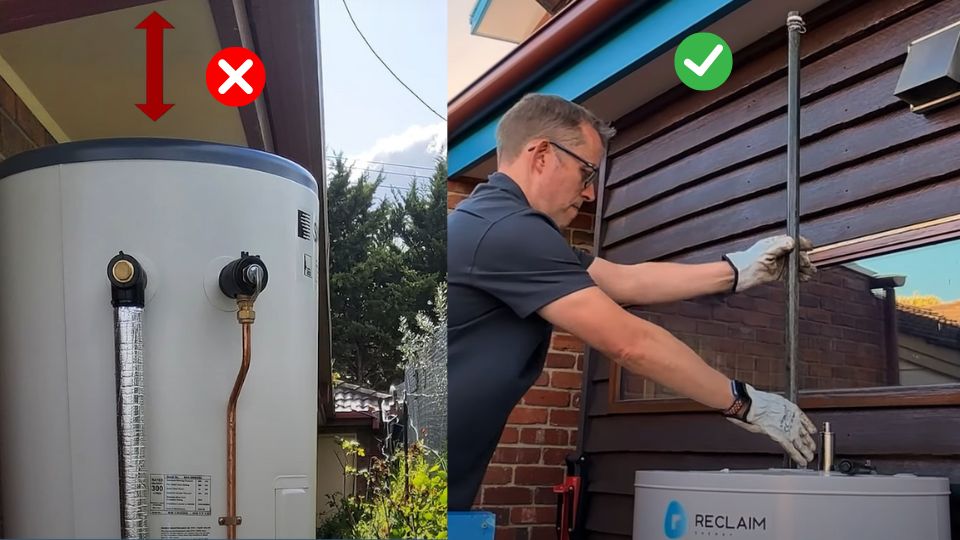
Mistake #3: No Clearance For Sacrificial Anode
Best Practice: Make anode replacement easy.
Unless you’ve paid about $1,000 more for a stainless steel tank, you’ll have a glass-lined tank with a sacrificial anode. The idea is that the anode corrodes instead of your tank.
The sacrificial anode needs replacing periodically depending on the heat pump model. For a split system like Reclaim, that’s every 3-5 years. For an all-in-one system like iStore, that’s every 1-2 years. The Australian Standards state:
“Wherever practicable, clearance should be allowed for removal and replacement of anodes, if
fitted.“
Bad tank placement or badly placed piping can make this anode replacement very difficult. That is why it is important to allow clearance for the anode to come out.
Solution: For a split heat pump, leave at least 1.5m of space above the tank to pull out the anode. If you have no other option than placing the tank under an eave, consider getting a flexible anode fitted.
For an all-in-one heat pump like the iStore, the anode is removed from the side. Your installer should allow for its easy removal by not blocking it with pipes.
A sacrificial anode that enters from the side will be shorter than one that enters from the top. This is why the side-entry anode degrades faster and needs replacement more often. Also, keep in mind that anode replacement on an all-in-one heat pump requires draining the tank first.
Pro-tip: If your area’s water quality is soft enough, a heat pump with a stainless steel tank could be a good choice: it does not need an anode at all. That way you won’t have to worry about anode removal.
Mistake #4: Electrical Connection
Mandatory: Hard-wired power on split units and some all-in-ones (check the manufacturer’s instructions).
Some HWHP manuals state that an electrician must install a dedicated circuit and a hardwired, lockable isolator to supply the compressor. However, some all-in-one units have been designed for installation without an electrician. These inits come with a hard-wired 10A plug.
If there is an existing 10A socket on the wall, a 10A plug can save on the cost of a sparky. This can typically reduce installation by $500 – $1,500, depending on how far the heat pump is from the switchboard.
The downside is that if another device is plugged into the same circuit and trips the shared breaker, there will be no hot water.
A hard-wired, dedicated circuit is preferred, and for new builds, it’s a no-brainer. But I’ll forgive a plug on an all-in-one heat pump that is designed to work with one.
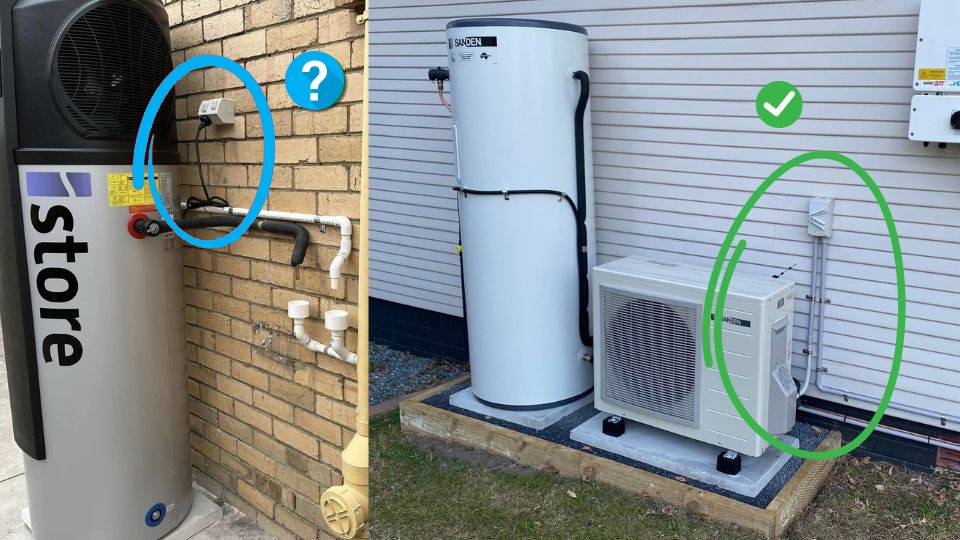
Solution: Ensure a licensed electrician hardwires your heat pump to a dedicated circuit and isolator switch, where required in the manufacturers’ instructions.
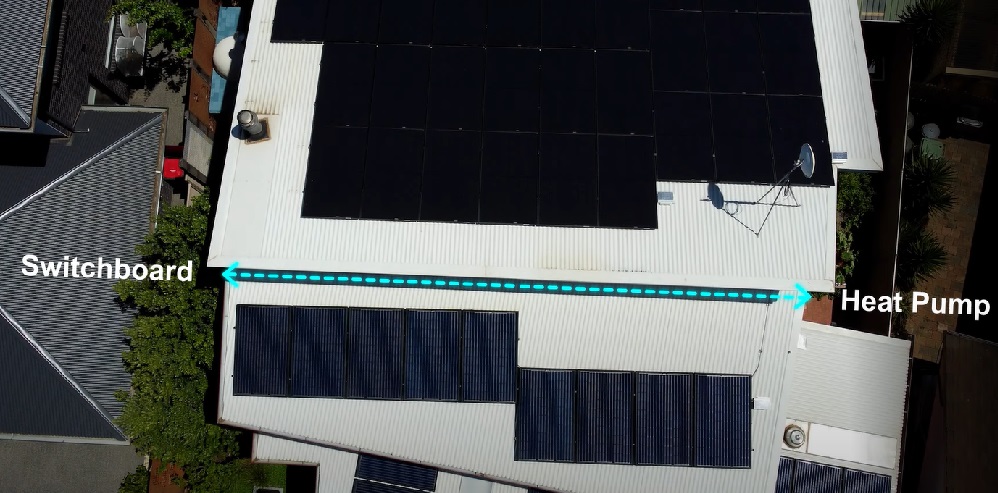
Note: Please consider the distance from your switchboard to the dedicated hard-wired connection. In the case of my house, we had to run cable from one side of the house across the roof to the other side: a long and expensive job.
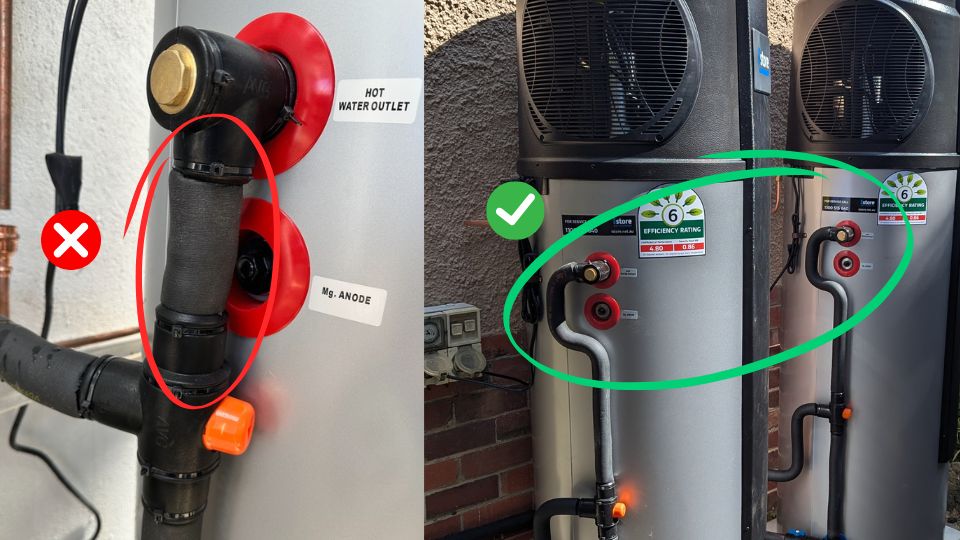
Mistake #5: Untidy Cabling
Best practice: Tidy wiring.
While the compressor unit of a Reclaim heat pump must be hardwired, the controller can be plugged into a standard socket. However, having untidy cables over the floor (especially near the drain) can be a hazard.
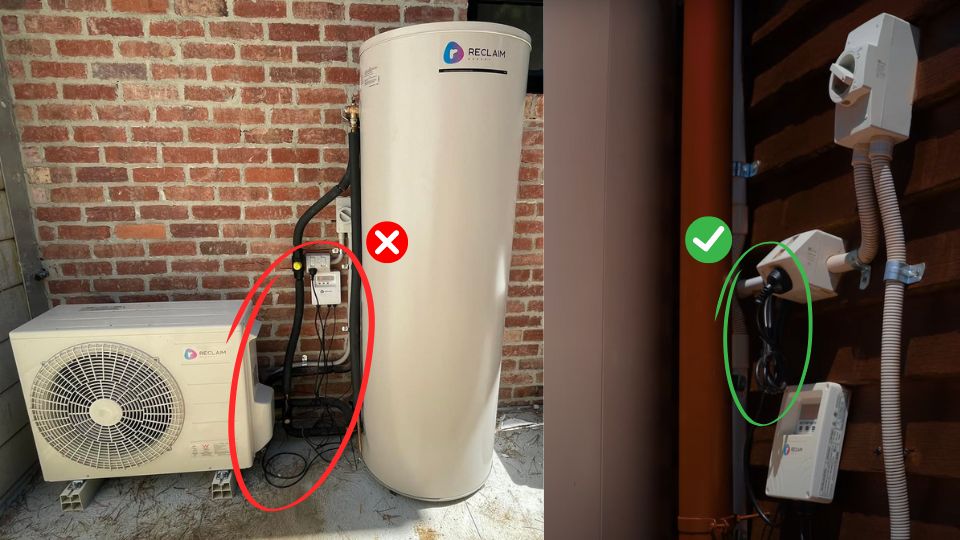
Solution: Good cable management with clips and zip-ties ensures cables are safely out of the way and don’t look a mess.
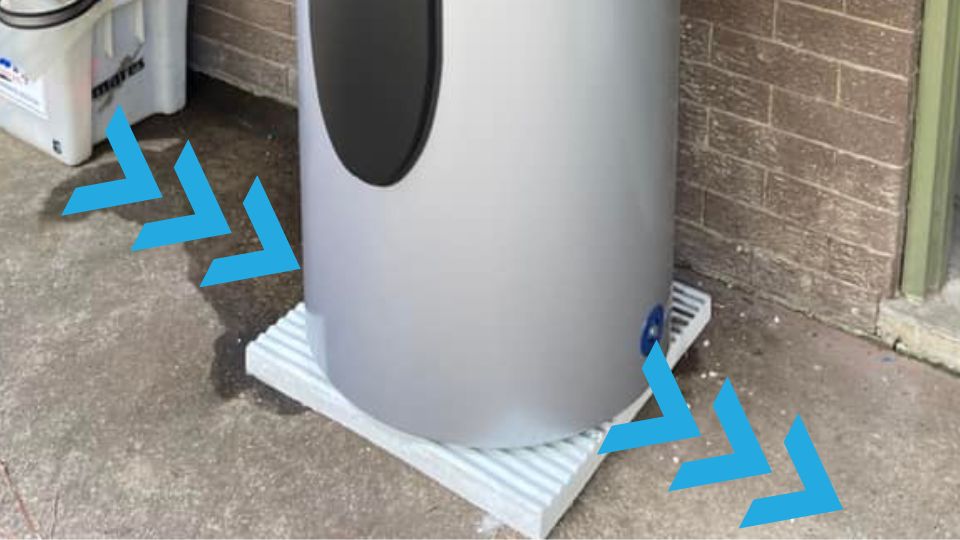
Mistake #6: No Proper Base
Mandatory: A proper base.
The tank must be elevated on a stable and level surface. Avoid putting the heat pump on the dirt or supporting it unevenly.
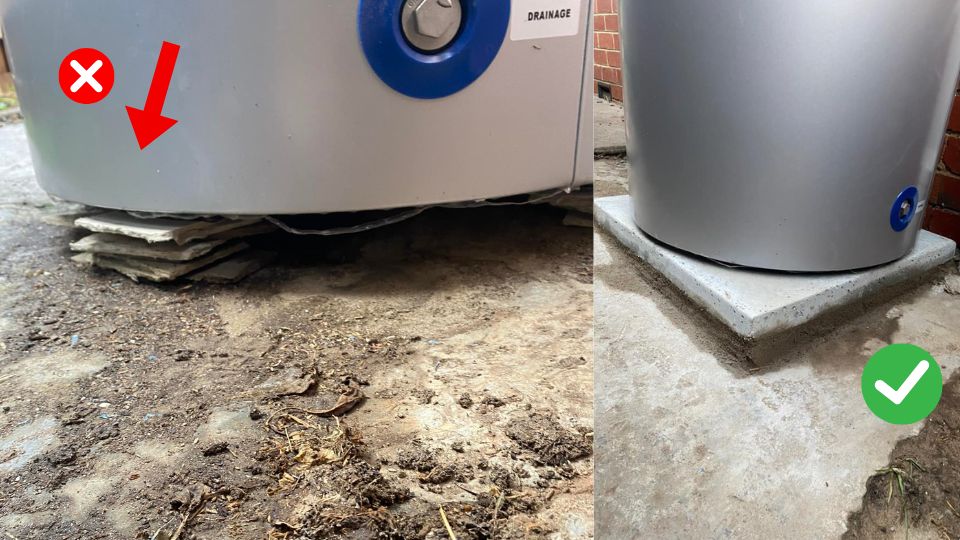
Solution: Install tanks on a proper concrete slab or paver. Ensure the slab/paver is big enough to cover the entire base. If water drips on the slab, the Australian Standards dictate the following:
“Water heaters located on surfaces that may become wet shall be installed to allow free air circulation between the surface and the base of the water heater except where the base of the water heater is constructed from a material that protects against corrosion.”
Pro-tip: Consider a rippled base to allow airflow between the surface and the base of the tank to prevent moisture buildup underneath the tank.
Mistake #7: Clearances for Airflow and Maintenance
Mandatory: Respect minimum clearances.
The heat pump installation manual dictates minimum clearances and installers must respect them. For example, the Reclaim manual states a clearance of 100 mm on the left and right of the compressor.
Heat pump units placed too close to walls, in corners, or near other obstructions like shrubs or trees restrict airflow, reduce efficiency, and may overwork the compressor, shortening its lifespan. These obstructions could also make it difficult to service the heat pump.
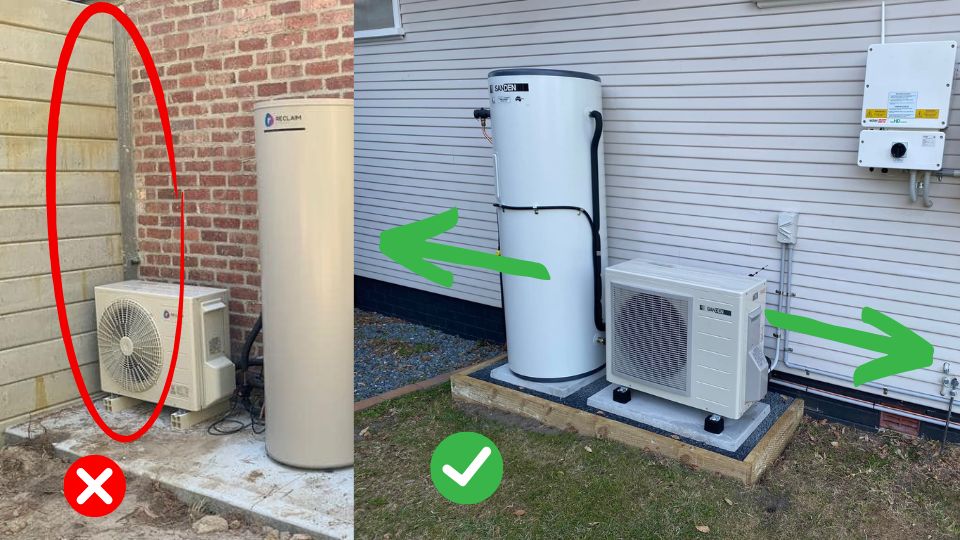
Solution: Maintain clearance left and right of your heat pump, as stated in its manual. The Reclaim manual recommends at least 100 mm left and right. The iStore manual mentions a minimum clearance of 300 mm from walls or barriers.
Note: While airflow is necessary, some heat pump manuals advise against installing the tank in an area with salt-laden air (e.g. coastal regions) as corrosion could occur. The Australian Standards define corrosive areas as areas that:
“contain substances such as any compound consisting of magnesium oxychloride (magnesite) or its equivalent, coal wash, acid sulfate soils, sodium chloride (salt), ammonia or
materials that could produce ammonia.“
The Standards suggest non-metallic alternatives or specially treated metals in environments where corrosion risk is high. Stainless steel, copper-nickel alloys, or plastic piping systems are some options that are suited for corrosive environments.
Mistake #8: Not Setting The Timer
Best Practice: Your installer should set the timer to heat your water from solar energy or off-peak electricity, or both.
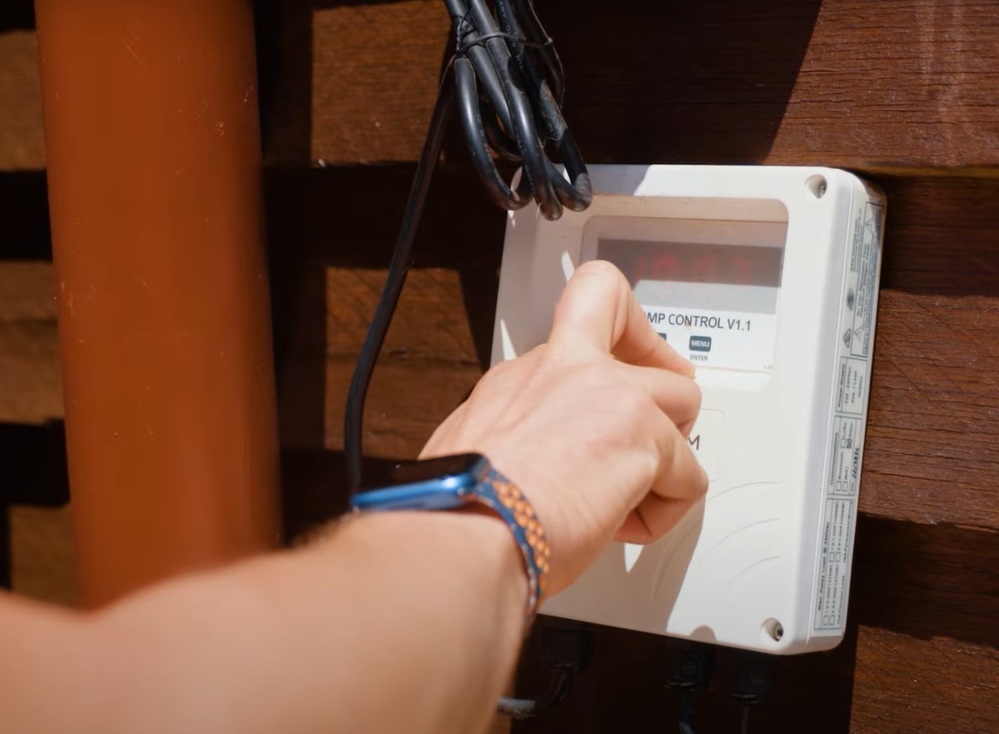
Solution: Make sure the installer shows you how to set the timer and sets it before leaving.
Assuming you have solar, it should come on around 11 am to be piping hot by 3 pm. This works great for most households.
But if, for example, your teenagers hammer the showers overnight, you might need an overnight boost too. The good news is, you’ll quickly discover this when you hear shrieks from the shower over breakfast!
Luckily, most heat pumps will let you add a second boost period in the small hours of the morning. If you are on a time-of-use tariff, schedule this for a cheap overnight tariff, typically 1am-5am.
What A Good Installation Looks Like
A well-planned heat pump installation avoids energy loss, enhances performance, allows easy maintenance and prevents costly repairs. Make sure to:
- insulate pipes, valves and fittings properly
- ensure proper drainage
- allow clearance for anode replacement
- use a dedicated electrical connection when required
- keep cabling neat
- elevate the tank on a stable and level surface
- allow clearance for airflow
Once you are ready to buy a hot water heat pump, I can help you get up to 3 quality quotes from pre-vetted installers: