Think of me as a detective, but swap out crime scenes for rooftop and commercial solar setups. Here, the thrill isn’t in chasing down overt dangers but in uncovering the subtle, critical details often hidden in plain sight. It’s an adventure where precision meets the pursuit of an installation everyone can be proud of.
As a licensed electrical inspector with 25 years in the game under my belt, I’ve seen things that would make any seasoned installer’s eyes water. We’re talking about those ‘oops’ moments that wouldn’t necessarily get anyone fined or fired, but that lead to imperfections that could have been avoided with a little more pride in the work.
This month, I’m taking you on a two-part tour of those ‘oh-no’ moments in solar installations. We’ll see what not to do, and then how it can be done better.
In part one: let’s look at what happens up on the roof.
When Solar Meets Stink Pipes
The Issue:
Imagine the scenario: during a solar panel installation, it becomes apparent that sewer ventilation pipes are obstructing the planned layout of the solar panels.
Cutting or adjusting these pipes might seem like a straightforward and harmless solution. I am certainly not a qualified plumber. But I do know that proper ventilation is crucial for maintaining air quality and preventing potential issues related to airflow.
This scenario often arises from tight deadlines and the pressure to complete installations promptly, compounded by planning oversights or designs made without full consideration of the roof’s existing structures — often a design from enthusiastic salespeople rather than accredited solar designers.
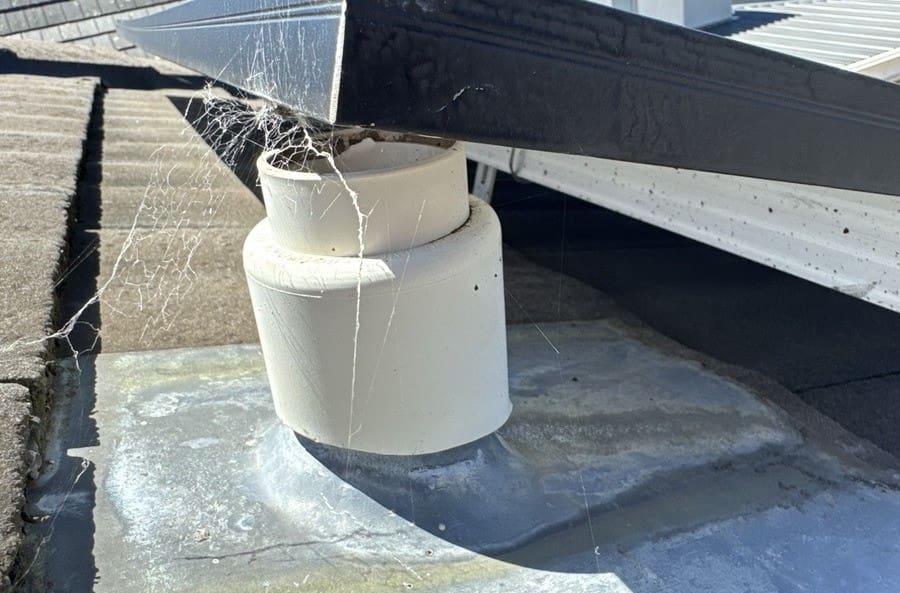
❌ Missed it by that much. Here, the ventilation pipe has been cut down and catches the edge of the array, likely a miscalculation.
A Better Approach:
The optimal solution here starts by taking the time to understand the roof’s architecture and layout, ensuring that the design of the solar array respects and accommodates essential ventilation systems.
What’s more, entrusting the system’s design to accredited professionals with the appropriate training can significantly enhance the quality of the installation as a whole.
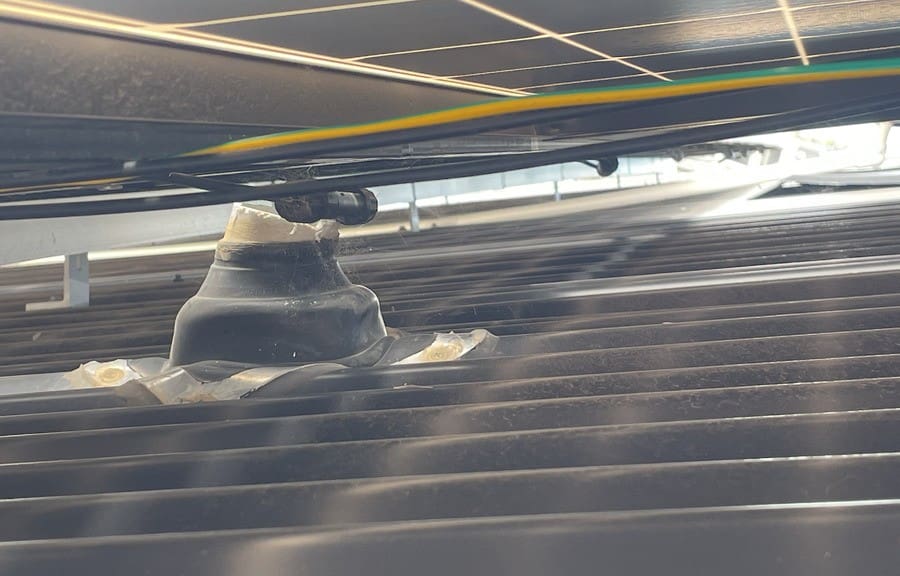
❌ They didn’t even try. This ventilation pipe under the middle of an array was always going to be cut.
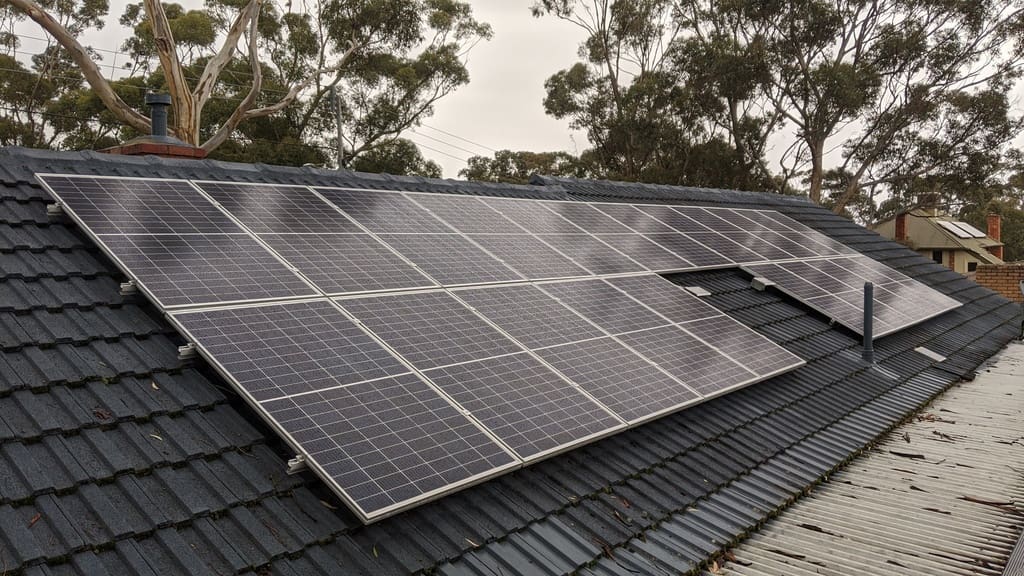
✅ Stink pipe and stink pipe shadow avoided.
Cracked Tiles And Dented Roof Iron
The Issue:
Here’s a scenario I’ve seen more times than I’d care to count: you’re walking the roof post-installation, and what do you find? Cracked tiles and dented roof sheets staring back at you; badges of a not-so-smooth installation rodeo.
These battle scars might not scream ’emergency’ right off the bat, but give it time, and you could find them inviting leaks and whispering sweet nothings to your savings, coaxing them out for unnecessary repairs sooner than you’d like.
Of course, when you mention your leaky roof to the installers, suddenly we’re playing a game of ‘Not I’ and pointing fingers everywhere and anywhere else.
I’ve been in the hot seat myself, accused by installers who would never admit they might have danced a little too hard on someone’s roof while carrying 25kg panels. After a couple of decades in the game, I can spot those dance floors from a mile away, and I can see exactly where those missteps happened.
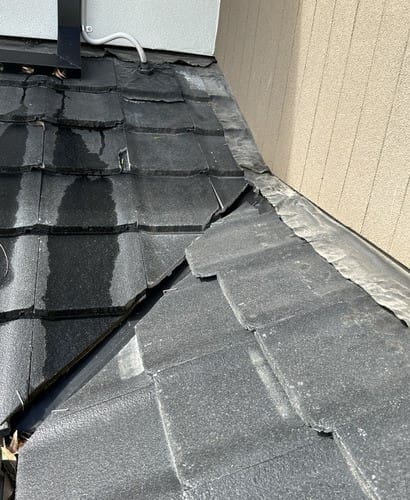
❌ Tiles have been shifted near the valley, another is cracked directly under where the installer would’ve accessed the roof penetration and external conduit for the solar DC cable.
A Better Approach:
So, how do we turn this ship around? Well, it starts with a little tenderness — gentle handling, softer steps, and the right gear.
Speaking of gear, let me introduce you to the MVP of rooftop footwork: the Dunlop Volleys. These bad boys are the ballet slippers of the solar inspection world, offering the grip and respect your roof deserves as you pirouette from panel to panel.
It’s about marrying comfort and accessibility with precaution and safety, ensuring that your installation doesn’t leave a legacy of leaks and grievances. After all, a roof over your head should be a sanctuary, not a souvenir shop of installation mishaps.
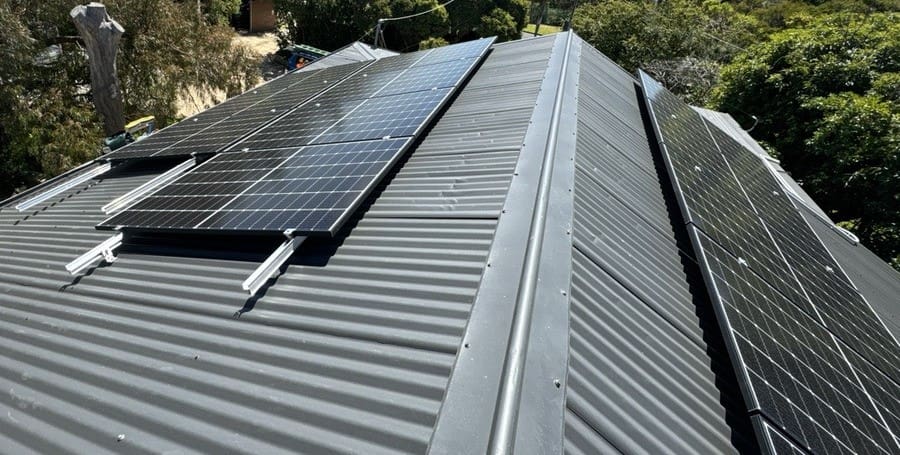
❌ There’s dints in it! Look between the ridge and the top of the array — it’s worse on the left side. The cause? Heavy-footed installers.
Split Roof Rafters
The Issue:
Alright, paint this picture: You’re up on the roof, feeling like a superhero as you install those tile brackets, but then — crack — you’ve gone and split a roof rafter. You’ve probably snapped the head of your roofing screw, too.
Getting this one wrong means messing with the skeleton of someone’s home. And let me tell you, those old, stubborn hardwood or OB timber rafters, aren’t gonna let you off easy.
Trying to muscle a roofing screw into these venerable old timers without so much as a ‘please’ or ‘thank you’? Yeah, not happening champ.
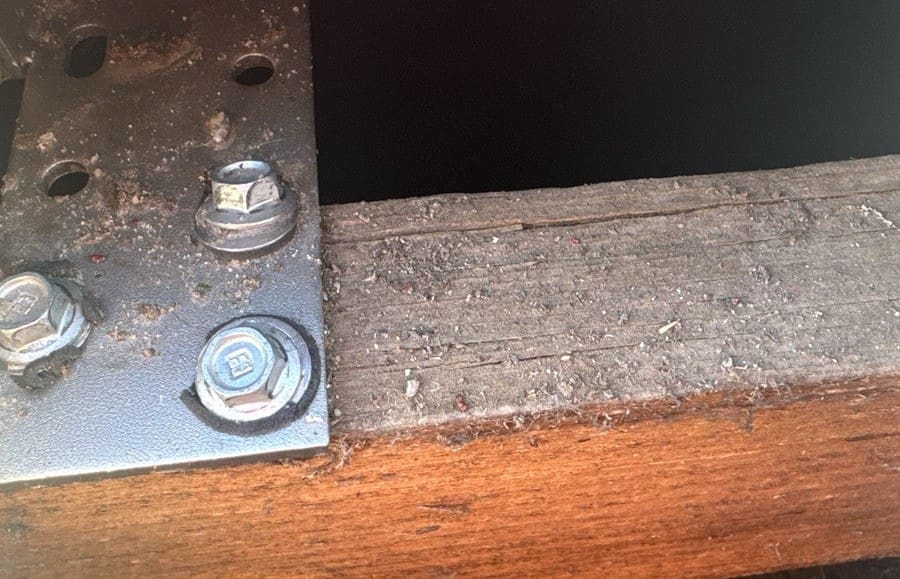
❌ Nothing wrong with three fixings, plenty wrong with split hardwood.
A Better Approach:
The secret here is pre-drilling.
A little bit of forethought and a gentle touch can prevent those rafters from splitting. And when it’s time to drive that screw home, think ‘slow dance’, not ‘mosh pit’. Ease it in with the care of threading a needle.
This way, you maintain the roof’s integrity and avoid turning a routine installation into an episode of ‘Home Renovation Horrors’.
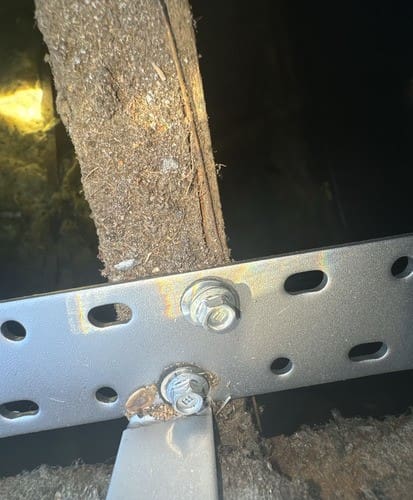
❌ Sir Splits-a-lot. Gotta pre-drill them.
Solar Panels Too Close To The Gutters
The Issue:
Picture this: solar arrays slapped down too close to the roof’s lower edge or gutter.
What happens next? Water flow on the roof throws a tantrum. Instead of smoothly sliding off into the gutter like it’s supposed to, rainwater pools up, or goes full Niagara Falls over your gutters. Not exactly the rooftop water feature you were hoping for, right?
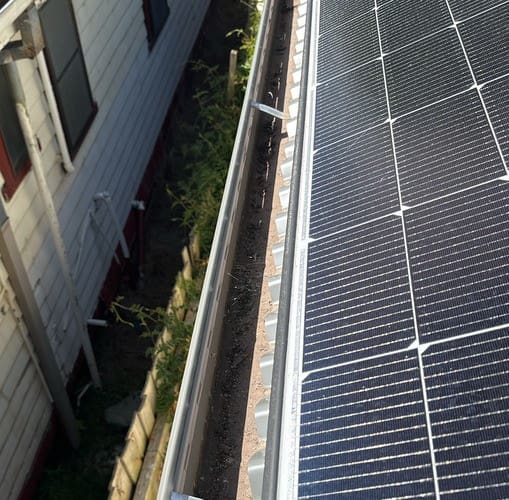
❌ Array way too low, gutters never had a chance.
A Better Approach:
Let’s flip the script. Imagine a world where every solar panel installation starts with a tip of the hat to the roof’s natural lines and a high-five to its drainage patterns.
We’re talking about a bit of rooftop respect here, planning the array layout so it accentuates the roof’s functionality, not hampers it.
By getting cozy with the roof’s design before the panels even make their rooftop debut, we can ensure that water flows smoothly, gutters stay drama-free, and your solar setup is a seamless extension of the home.
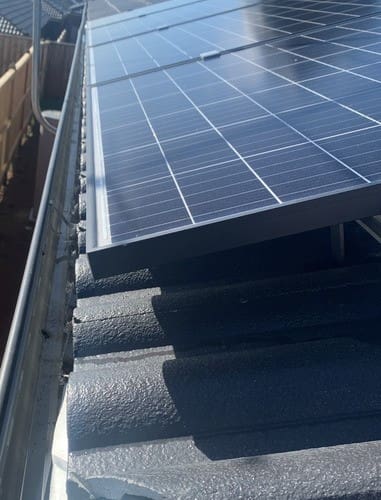
❌ Too close to the gutters, rain will bring a waterfall.
Raising the Bar on Rooftop Solar Craftsmanship
Slapping solar panels onto a roof isn’t just about playing Tetris with shiny rectangles; it’s about meeting the whole vibe of the home.
We’re talking about weaving a brand new system into the fabric of a home, giving a nod to the old while rolling out the welcome mat for the new.
These snags we’ve chatted about? They’re not just oopsies or whoopsies. They tell tales of missed opportunities for real craftsmanship — work that not only looks good but does good, too.
Stay tuned for part two, where we look at what can go wrong inside the roof — where errors are out of sight and out of mind.

 RSS - Posts



Stink Pipes:
I’m also not a plumber, but an alternative to the stink-pipes that interfere with solar installation is the so-called Air Admittance Valve (AAV). This I learned from a friendly plumber who came to look at our solar hot water system.
The AAV can be mounted below the roof surface, because it only allows air to be sucked into the pipe, not air (stink) to escape. This allows air to be replaced in the pipe when water is flushed down, to maintain the pressure balance. In my case the stink pipe was on the outside wall but protruded beyond the gutter and shaded my panels. It was a simple matter of cutting the pipe below the gutter and installing the AAV to prevent the stink getting out.
Not being a plumber myself, I’d suggest getting hold of one before installing an AAV on your system, as there might be downsides.
Cheers,
Alistair
Have a chat to a plumber, or better, a roofing plumbing teacher.
Those stink pipes are supposed to be exit paths for gas that builds up in the waste pipes.
Inducts (inlets) are outside the building, possibly on top of the old septic tank. Air heats up slightly due to sunlight, etc and flows out above the roof .. along with methane and smells.
If this was not true, then flammable, smelly gases could build up.
Be kind to induct and educt valves – they are essential.
Installation here finished 2 hours ago. No roof penetrations for array fixing, as Sunlock or Clenergy clamps simply mounted onto the Stramit Speed Deck 700 ribs, hopefully over the roof fixing clips underneath, for maximum structural strength. (No roof penetrations for roof fixing, either.)
They moved one small array, on request at the clip stage, to delay by several hours, intrusion of the wood heater flue shadow, late afternoon. (It’s hard to get away with a lot when the customer is the system design engineer.)
In an AC and DC coupled system with 4 inverters, 3 battery banks, and 2 MPPTs, it can take a few hours to tweak the comms and other config to have it shuffling power where wanted. (The Fronius inverters were being throttled back on reaching battery float voltage, even though still in bulk charge phase … dufus firmware. But with LiFePO₄ there’s not much wrong with setting float the same as bulk when that is a bit conservative.) The EV charger still doesn’t show up on the Victron dashboard, but maybe installing the GUImods package will fix that.
Fully off-grid, it finished charging the 46 kWh house battery, put 20 kWh into the EV, and boosted the HWS simultaneously, with half the arrays throttled back once the battery came up. That suggests that even in winter there’ll be enough for comfort. There’s a Grundfoss water supply pump, so it’s nice to be able to flush the toilet without having to have the generator going.
The EV charger serves as a night light in the garage. Had to use a torch in the past, when the generator was off at night. Mod cons are great!
I have some much better examples of badly split rafters if you want them, showing what happens inside the roof…