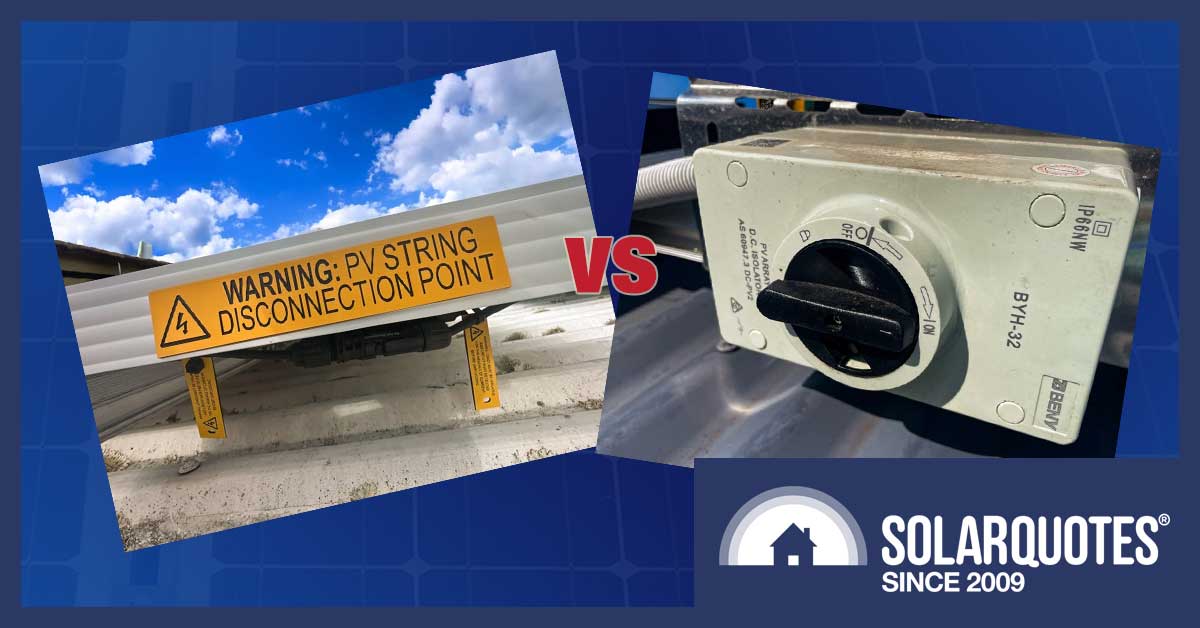
Let’s shed some light on the ongoing debate between disconnection points and rooftop isolators; two critical aspects that have stirred discussions within the solar industry.
As a Licenced Electrical Inspector, I’m here to look into the intriguing world of real-world solar installations in the Australian market. This is the first article in a monthly series.
The Emergence Of DC Isolators
DC isolators caused quite a stir upon their introduction early last decade. Depending on who you talk to, either firefighters in Victoria played a significant role in advocating for them, or it was a typical “nanny state” decision.
The idea is that in the event of a fire, the solar panel arrays on your roof could be safely switched off by anyone on the roof using the rooftop isolator – so they could be confident they would not be electrocuted as they battled the flames.
DC isolators became mandated nationwide via the Australian Standard for solar installations: AS5033.
As with any new technology, challenges arose, including concerns about workmanship, product quality, and the impact of UV exposure degrading the plastic isolators.
The Rise And Fall Of Rooftop DC Isolators
Fast forward to late 2021, and an update to the 5033 standard meant – in many cases – rooftop DC isolators were no longer mandatory. An alternative option in the latest standard is the disconnection point.
A disconnection point is a connector that can be pulled apart, opening the DC circuit to the solar panel array, isolating it from the inverter.
This development was generally well-received by installers, as it promised streamlined installations and reduced potential failure points.
However, like any change, it also brought unique challenges, such as additional cabling requirements and restrictions on specific installation locations.
Let’s now explore the pros and cons of each approach:
Disconnection Points (DPs) Pros & Cons:
Pros:
✅ Simplified installations: Disconnection points offer installers a more straightforward and efficient installation process.
✅ Reduced potential failure points: With fewer components, the risk of failures due to faulty parts is minimized.
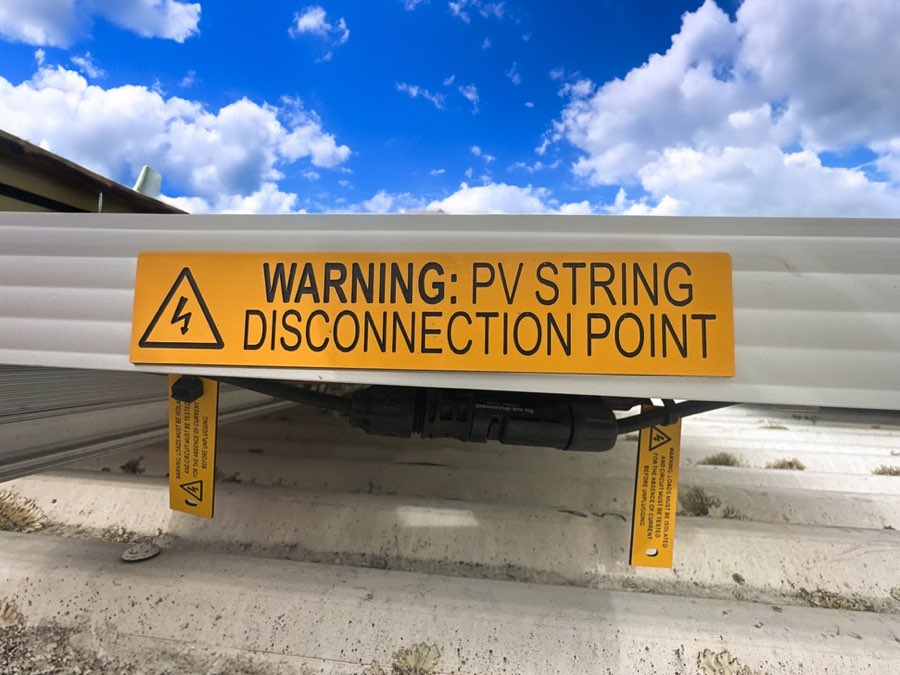
This is an image of a disconnection point with the correct labelling.
Cons:
❌ Increased cabling requirements: Implementing disconnection points may necessitate additional cabling, which could complicate the installation process.
These new measures aim to minimise the risk of cables falling if a ceiling collapses – which can happen in a house fire.
Specifically:
- Cables and conduits must be firmly attached so they don’t accidentally come loose. They shouldn’t be placed closer than 50 mm to the bottom of the roof.
- If cables are between 1 and 1.5 meters from an outside wall, they should be at least 0.6 meters above the ceiling. If they’re lower, they must be tied to the roof.
- If cables are anywhere else in the ceiling space, they must be 0.6 meters above the ceiling. If there is less than 0.6 meters of space in the ceiling, the cables must be within 1 meter of the outside wall.
- If people can get into the roof or floor space where the cables are, you need to put up a sign.
Here’s an example from an inspection where a disconnection point has been used, but the cabling is not compliant with the stricter rules:
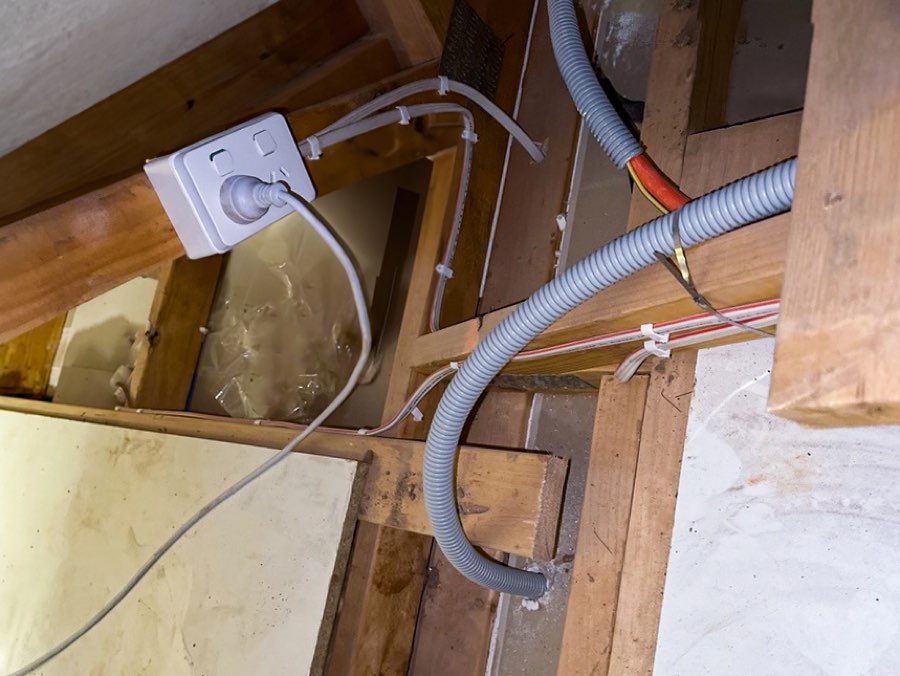
This is an image of some DC cabling in the roof cavity. It is non-compliant as it has been installed too close to the ceiling and is well away from an outside wall.
❌ Exclusion zones: Certain installation areas, such as cathedral ceilings, may not be suitable for disconnection points, requiring careful planning.
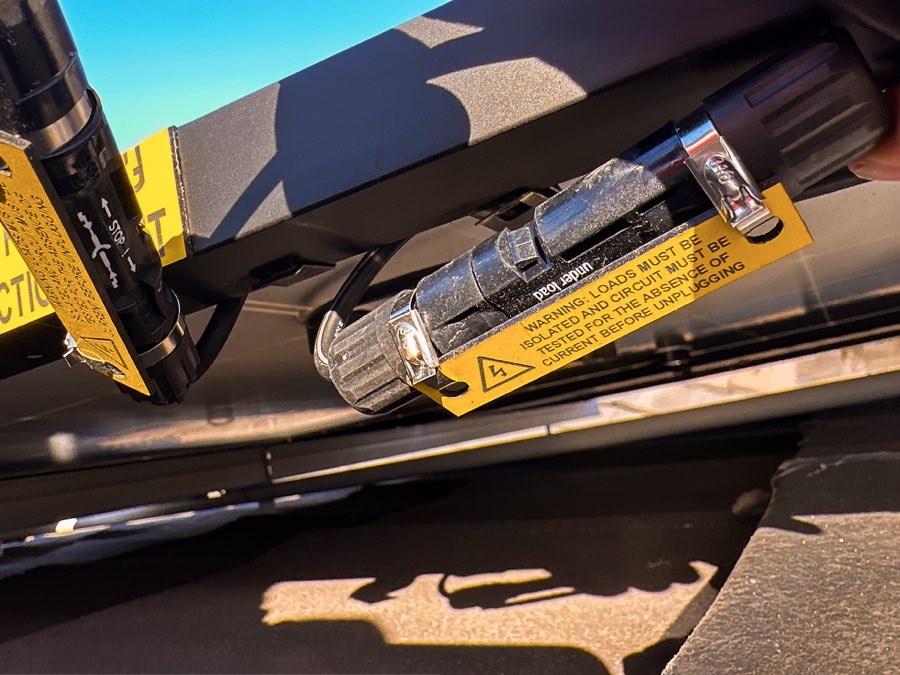
This is an image of a non-compliant disconnection point. The steel cable tie fixing the label in position is done in a way that does not allow the conductor to be disconnected.
Rooftop Isolators:
Pros:
✅ Maintenance convenience: Rooftop isolators provide an advantage for maintenance, making testing and access more accessible for installers.
✅ Familiarity for some installers: Those already accustomed to rooftop isolators may find them more comfortable to work with initially.
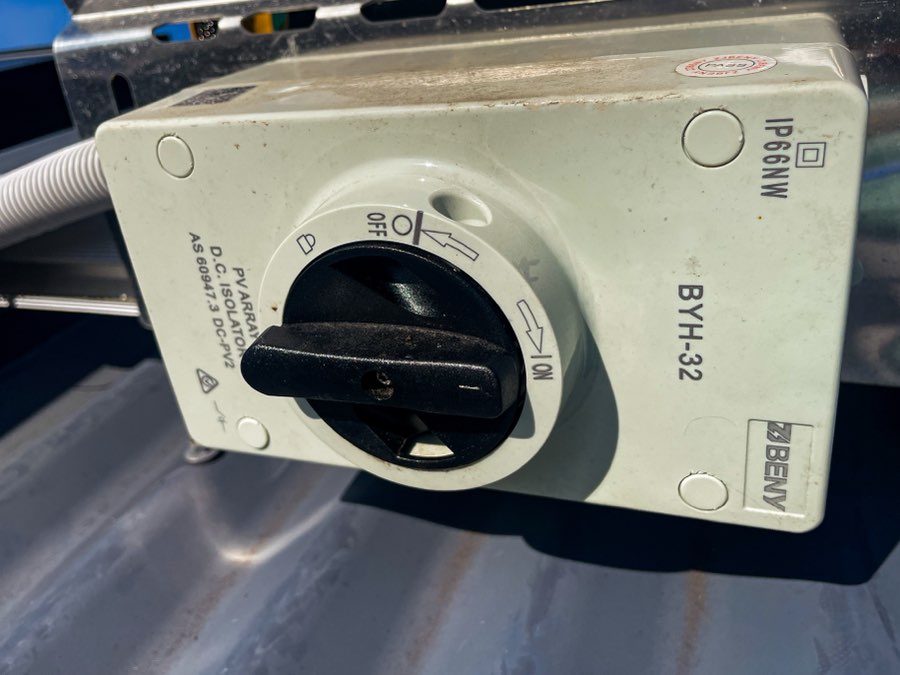
This is an image of a DC isolator that installers are used to and were easily operated. This would not be compliant with the current standard.
Cons:
❌ Stricter requirements: Utilising rooftop isolators demands additional measures, such as liquid drain valves, to prevent water ingress.
❌ Potential complexities: Installing rooftop isolators may involve additional considerations, including larger shrouds and other safety measures.
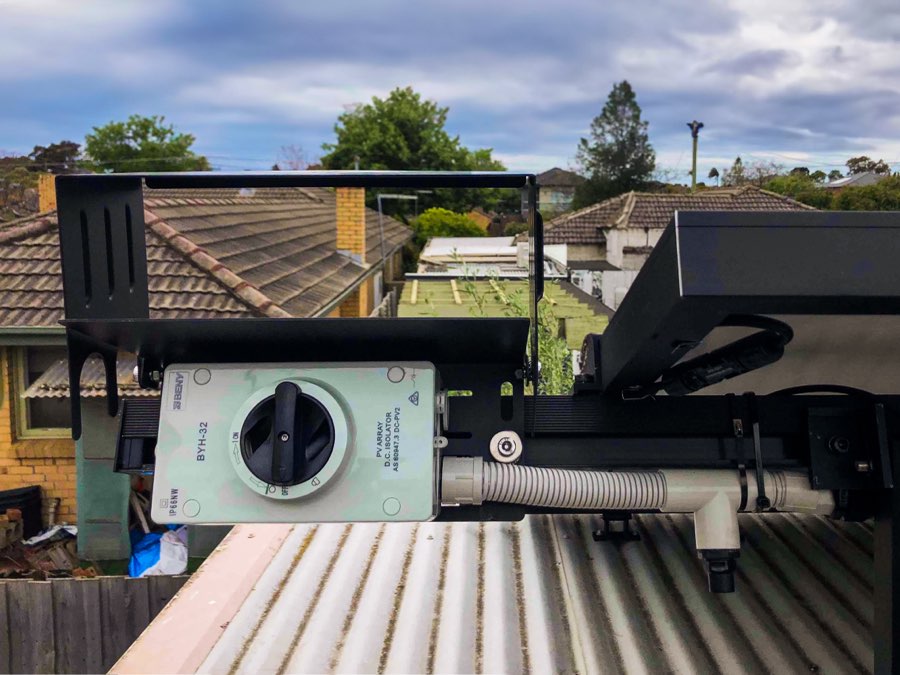
This is an image of a compliant DC isolator. Note the liquid draining device installed on the very short piece of conduit.
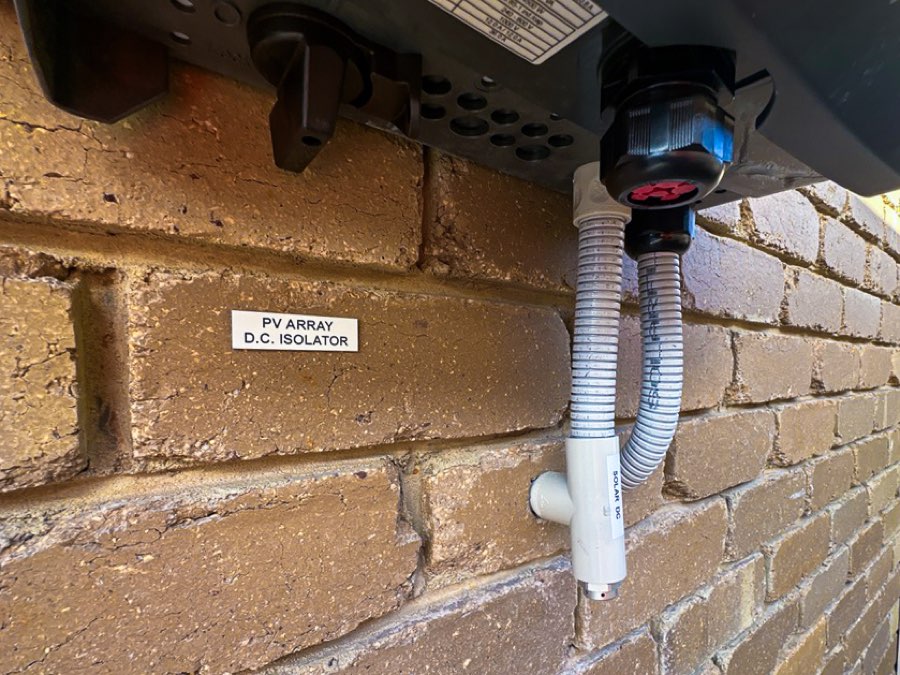
This is an image of a conduit enclosing DC cabling to an inverter with an integrated DC isolator. Again, note the liquid-draining device on the conduit at its lowest point.
Installer Preferences And Real-World Observations
From my observations, most solar installers in the industry have embraced disconnection points. They seem to be the preferred choice, with rooftop isolators being used only when no other options are available. This may be due to situations where the DC cabling must be run through a cathedral ceiling or a shallow cavity that cannot achieve the minimum clearance required.
However, some installers may still be adjusting to the new concept, leading to occasional issues like running cables within exclusion zones or improperly implementing the vertical drop method, like in the image above.
Even if installers opt for rooftop isolators, the stricter requirements now in place call for careful attention. Liquid draining devices and larger/more enclosed shrouds are a must, making the process more intricate.
The liquid draining device may seem a little conservative, especially when installed on a piece of conduit that may only be 300mm long and has a multi-hole gland sealing the end. It seems that the rules are encouraging no conduit to be installed directly into isolators containing DC to reduce the risk of water ingress causing damage to equipment.
The popularity of disconnection points since their introduction cannot be denied. In most installations I see, the installer has demonstrated that they understand the new disconnection point standards. However, some major non-conformances are detected; such as the DC cabling installed inside exclusion zones. Generally, most defects found are minor, like misplaced labelling or the location of DPs.
In conclusion, as a Licenced Electrical Inspector, I support using disconnection points when executed correctly. They offer benefits in terms of inspections and installation efficiency, leading to positive outcomes for consumers. As with any change, continuous education and training are vital for installers to stay current with the latest standards and ensure high-quality, reliable solar installations.

 RSS - Posts


Thank you Pat, for this first update from a regulatory viewpoint.
On-roof isolators have concerned me for some time, both from utility and safety viewpoints. Given that a DC isolator is needed at the inverter/MPPT anyway, to avoid the ludicrous situation of having to climb onto the roof prior to ground level maintenance, it is very encouraging to have confirmed that it now obviates the need for another on the roof.
There seems to be a significant omission in this article; the reports of fires caused by on-roof isolators. Attempting to ameliorate the problem with rain protection, water drainage schemes, etc., seems far inferior to the splendid solution of eliminating the hazard apparently created by the regulation or its implementation.
The information regarding conduit drainage is eye-opening, but clearly needed, on reflection. I’m planning to ask the installer if it is possible to run PV conduit up under the ridge capping, so always uphill from the arrays. That would put the drainage point down under the arrays. But hold … should there be another down near the inverter/MPPT? There’s condensation to consider, after all. Indoors, a small hole at the bottom of a U-bend would seem to be as fancy as practical considerations would require? Or a couple of small holes in the bottom of the switchgear enclosure, perhaps.
This stuff is trickier than it seems at first glance.
I have a 6.6KW system that’s about 5 or 6 yrs old .it has 2 DC idolaters at 2 panels banks and 1 at invertor . No drains are fitted to DC switch. But if lm wright the DC switches are mounted under the solar panels out of direct sun light and rain. Is this a problem
For an installation on a mono pitched roof where HD conduit is required for UV protection of the solar DC cable, is it OK to have the conduit open at each end.
One end is hidden under the panel (so any moisture can harmlessly flow out), and connected via MC4 to the panel string.
The other end is connected through the wall into the attic space (AS/NZS5033 applies for 600mm ceiling clearance etc) via MC4 connectors mounted on the underside of a IP67 box. Once again any moisture in the conduit can escape via gravity as the conduit stops short of the box. (The exposed cable is less than 300mm to comply clause 4.4.5.2.2 Exception 2)
Hi David, open conduits are generally fine even in an outdoor environment. Providing they do not lead to a DC isolator without a liquid draining device installed, no worries.
Thanks that is super useful to know. I am meeting with an installer next week and have some ideas to run past him so I can contribute sweat equity to get a quicker payback.